
When and How to Plant Turmeric: A Seasonal Guide for Gardeners in Any Climate
Turmeric (Curcuma longa) is a powerful medicinal root praised for its vibrant color, earthy flavor, and exceptional health benefits. But knowing exactly when and how to plant turmeric in your region is key to a successful harvest. Whether you garden in tropical climates or cooler zones, here’s your seasonal guide to growing thriving turmeric plants at home.
ANTI-INFLAMMATION STARTER KIT (PDF)
Jumpstart your anti-inflammatory journey with a 1-pager, 3 quick recipes, and a printable shopping list. Practical, actionable, and deliciously healthy!
Download Free GuideSeasonal Planting Times by Climate
- Tropical/Warm (Zones 9–11): Plant turmeric rhizomes outdoors in early spring (March–April).
- Temperate/Moderate (Zones 6–8): Start turmeric indoors 6–8 weeks before your region’s last frost date; transplant outdoors after frost danger passes.
- Cooler Climates (Zones 3–5): Grow turmeric exclusively indoors or in containers—plant indoors early spring, move outdoors when consistently warm.
Step-by-Step Turmeric Planting Guide
Turmeric (Curcuma longa) is a tropical perennial that rewards patience with a harvest of golden rhizomes bursting with health benefits. While it loves warmth and humidity, it can be grown successfully in containers or garden beds in many climates with a bit of care and planning. Follow this step-by-step guide to grow your own vibrant, healing turmeric at home.
1. Selecting Rhizomes
Choose fresh, firm, and plump rhizomes (the underground stems) with several visible buds or “eyes.” Avoid dry or shriveled pieces. Grocery store turmeric can work, but certified organic seed rhizomes are ideal for strong, disease-free plants.
2. Pre-Sprouting for Early Growth
Soak the rhizomes overnight in warm water to soften their skin and stimulate sprouting. Then, place them in a warm, humid spot (like near a window or inside a plastic-covered tray) for 2–3 weeks until small green shoots emerge. This gives your turmeric a head start before planting in soil.
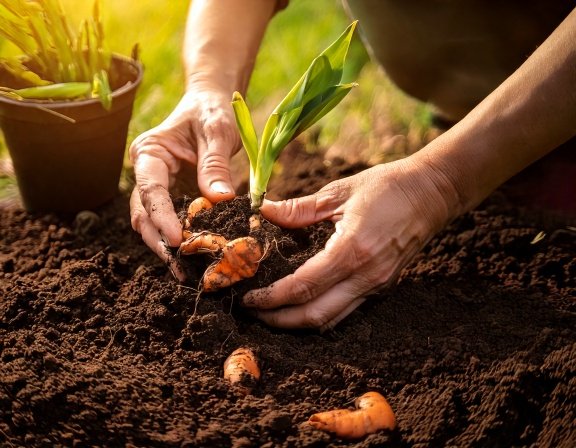
3. Planting Depth & Spacing
- Plant sprouted rhizomes horizontally, about 2 inches deep with buds facing upward.
- Space each rhizome 12–16 inches apart in beds or large containers to allow root expansion.
- Water thoroughly after planting to help settle the soil.
4. Soil & Fertilization
Turmeric thrives in rich, loose, and compost-amended soil that retains moisture but drains well. The ideal soil mix combines loam, organic compost, and a bit of sand or coco coir for airflow. Turmeric is a moderate feeder—work in organic compost or worm castings every few weeks during the growing season to encourage lush foliage and root formation.
5. Mulching for Moisture & Weed Control
Apply a thick layer (2–3 inches) of organic mulch such as straw, shredded leaves, or coconut husk around the plants. This helps:
- Conserve moisture during warm weather
- Suppress weeds that compete for nutrients
- Regulate soil temperature and prevent drying
Keep the mulch pulled slightly away from the plant base to prevent rot.
Pro Growing Tip
Turmeric loves warmth—maintain temperatures between 70–95°F (21–35°C). In cooler climates, grow in containers and move indoors when temperatures drop below 55°F (13°C). With consistent watering and sunlight, your plants will thrive and produce harvest-ready rhizomes in about 8–10 months.
Garden Insight
Turmeric not only enriches your garden with lush tropical foliage but also provides an abundant, homegrown supply of one of nature’s most powerful healing roots. Every rhizome harvested is a reminder that wellness can start right in your backyard.

Explore Garden Fertilizers at Amazon
Seasonal Care and Maintenance
Turmeric follows a slow, steady growing rhythm throughout the year. Each season plays an important role in the plant’s health and eventual rhizome yield. With a little attention and seasonal adjustment, you can enjoy vigorous growth and a bountiful harvest year after year.
Spring: Establish and Energize
Spring marks the beginning of turmeric’s growing cycle. As temperatures warm and days lengthen, rhizomes awaken from dormancy.
- Planting Time: Transplant pre-sprouted rhizomes once the soil warms above 65°F (18°C).
- Watering: Keep soil evenly moist—but not soggy—especially during early growth stages.
- Fertilization: Feed monthly with organic compost tea, worm castings, or a balanced liquid fertilizer to encourage leaf and root development.
- Mulching: Add a 2–3 inch layer of organic mulch to conserve moisture and warm the soil.
Summer: Nourish and Protect
Turmeric thrives in heat and humidity, but consistency is key to healthy growth and vibrant rhizomes.
- Moisture: Maintain steady watering—deeply about 1–2 times per week. Avoid letting the soil completely dry out.
- Heat Protection: In very hot climates, provide partial afternoon shade or light shade cloth to prevent leaf scorching.
- Mulch Maintenance: Replenish mulch as it decomposes to help regulate soil temperature and suppress weeds.
- Foliage Care: Trim any yellowing leaves or damaged stems to direct the plant’s energy toward healthy growth.
Autumn: Prepare for Harvest
By late autumn, the lush green leaves begin to yellow and die back—nature’s signal that it’s time to harvest your golden roots.
- Watering: Gradually reduce watering as the plant enters dormancy. Excess moisture can cause rhizomes to rot.
- Harvest Check: Dig up a small section to check rhizome maturity; they should be plump, aromatic, and richly colored.
- Fertilization: Stop feeding to allow the plant to channel energy into rhizome ripening.
Winter: Harvest and Rest
Turmeric is not frost-tolerant. In cooler regions, plan to harvest before the first frost or bring your plants indoors for overwintering.
- Harvesting: Carefully dig up the rhizomes, wash, and dry them thoroughly before storing or replanting.
- Indoor Overwintering: In containers, cut back foliage and move pots to a warm, dry area (above 60°F / 15°C). Reduce watering to once every few weeks.
- Replanting: In late winter, select the healthiest rhizomes for replanting in the coming spring.
Pro Tip:
Rotate your turmeric growing areas every 2–3 years or refresh potting soil to prevent nutrient depletion and disease buildup. Turmeric loves rich organic matter—feed your soil, and it will reward you with vibrant, healing roots season after season.

This growing guide is for educational purposes only, based on best practices and home gardening experience. Always follow local recommendations and consult experts for region-specific advice.
Active Ingredient: Curcumin
Did you know?
Want More Natural Healing Tips?
Subscribe to Health Intel Daily for the best homegrown wellness guides, seasonal growing charts, and remedy recipes delivered to your inbox!
Subscribe